Bulk edit instances of recurring calendar events
You can bulk edit the attributes of specific instances for one or multiple recurring calendar events. At once, you can change the activity Core component of both schedules and time records in Workforce Management (WFM). When an employee performs any kind of work, activities specify the scheduled work and capture employee adherence to their schedule., duration, and start and end dates and times of these selected instances. This feature allows you to make the same changes to these instances quickly and efficiently.
Example: Bulk edit instances of recurring calendar events
For example, a manager has scheduled an important training Semantic Intelligence (Si) process in Speech Analytics in which the system implements machine learning-based methods to extract and surface ontology-related items found in a sampling of transcribed interactions. session on Monday from 1:00 to 3:00 PM. Filter to view all recurring calendar events on this date and during this time period.
At this point, you have a few options:
-
Delete all instances of these events to make this time available.
-
Change the start time of all these instances to start after 3:00 PM.
Before you begin
Select campaign data for schedules or Select no campaign for schedules
Procedure
-
From Tools, select Recurring Events Manager.
-
From Scope, filter the employees and dates you want:
-
Optional. From Employees, select the employee filter you want. To include all employees, select No Filter.
-
From Dates, enter the date range for which you want to view recurring calendar events and instances.
-
Select Filter.
Under Recurring Events, the system displays all the recurring calendar events that match the filter criteria.
-
Select the recurring calendar event Scheduled event in WFM that is manually created on the schedule, can be a single instance or recurring event, and can have one or multiple attendees. Examples of calendar events are meetings or training sessions. instances that you want to update or delete:
-
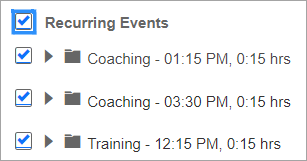
To select all recurring calendar event instances for all displayed events, select the check box next to Recurring Events.
The system selects all recurring calendar event instances. Expand each event series to view the instances.

-
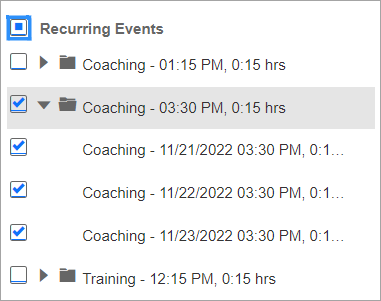
To select all recurring calendar event instances for specific displayed events, select the check box next to the events you want.
The system selects all recurring calendar event instances for the selected events. Expand each event series to view the instances.

-
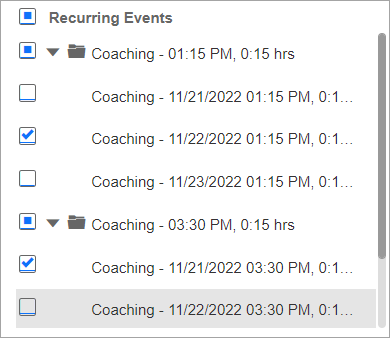
To select specific recurring calendar event instances for specific displayed events, expand the events you want and select the specific instances for those events.

-
-
Select Apply.
The system displays the attributes of the selected recurring event instances, including the Activity, Start, and End date and time, Duration. If the values for any of these fields are the same for all selected instances, the actual values are displayed. However, if the values for any of these fields are different for any of the selected instances, Multiple appears in the relevant field.
For example, all the selected instances start and end on 02/22/2021 and are associated with the activity, Coaching Application that provides a method of directing, instructing and training a person or group of people, with the aim of achieving a set goal or developing specific skills.. The Start and End date field displays 02/22/2021 and the Activity field displays Coaching. However, the Duration and the Start and End times are different for some or all the selected assignments. Therefore, Multiple is displayed in these fields.
The system also displays the list of attendees for the selected instances.
-
Under Set changes, select the new values you want for any of the attribute fields, including Activity, Start and End date and time, and Duration.
For example, you can change the Start time of all selected instances to 4:00 PM. Another example is that you can change the Duration of all selected instances to be 30 minutes.
-
Optional. To delete the selected instances, select Delete selected instances, and confirm the deletion.
-
Optional. To export the instances to an external file:
-
Select Export selected instances.
-
From the Export screen in the Export file name field, type the name of the file to which you will export data without a file extension.
The system generates text (.txt) files with different delimiters (depending on the Delimiter value).
-
Under Settings, select either Tab or Comma for the delimiter in the file.
-
To export the selected instances, select Export.
Depending on your browser options, the system either displays a download dialog screen, or saves the file automatically to your Downloads folder.
-
-
Select Save.
The system displays a prompt, indicating that any changes to an instance in a series either creates an exception, or edits an existing one. All future updates to the recurring event series does not affect these instances.
-
To save your changes, select Yes.
One of the following occurs:
-
If there are no errors associated with the selected updates, the system saves your changes.
-
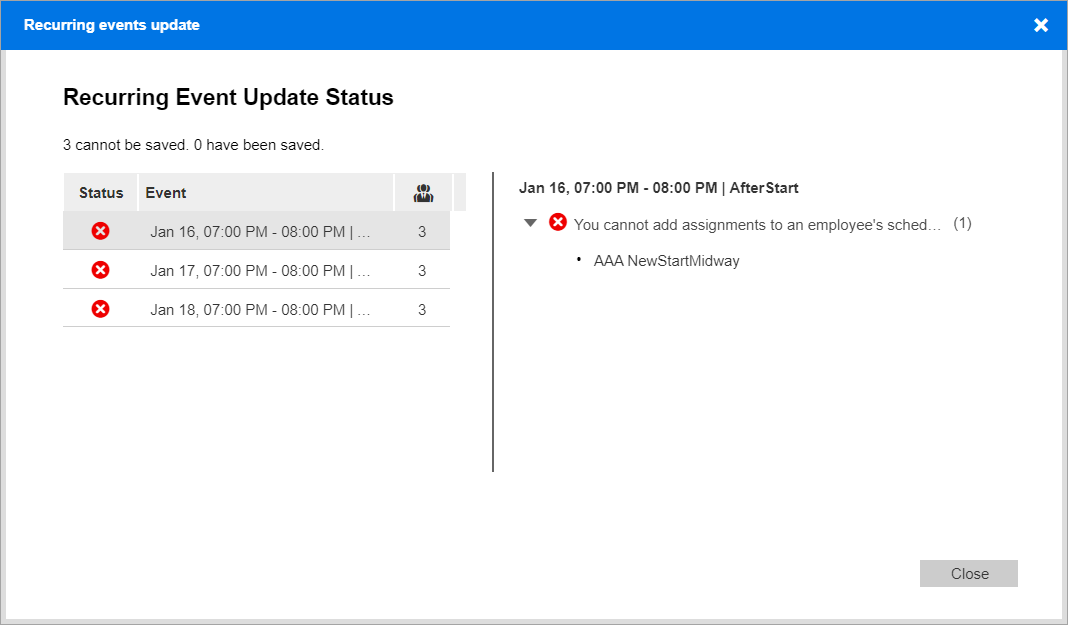
If there are errors associated with the selected updates, the system cannot save those specific updates. It still saves the updates without errors.
The system displays an additional status screen, indicating the number of events that cannot be saved, and the number of events that have been saved.
It lists the impacted events of each error, including the date, time, and the total number of attendees.

-
-
Optional. To view more details about each error:
-
Select the event on the left.
-
View the error details on the right.
The system indicates the reason for the error, and the number of impacted attendees.
-
To display the name of the affected instance, expand the error.
-
After reviewing the errors, select Close.
-